
Strainly empowers growers, but also intends to empower breeders… or aspiring breeders. If you have been growing for some time and are now considering breeding your own seeds, designing and building an effective and safe breeding space can be an intimidating endeavour. In this article, Professor Q from Aficionado French Connection will describe the breeding setup they use to produce some of their lines… Ready?
Breeding is the science of selecting traits (physical or chemical) of a plant to produce other desired combination of traits. Breeding is sometimes at the cross-roads of art and science. The practice of breeding has existed for as long as human agriculture, that is for more than 11,000 years, with the domestication of the first plants for food use. Since then, humans have reproduced plants with the best characteristics in order to improve the nutritive and / or productive capacities of plants intended for humans or animals. There are different breeding techniques, ranging from simple selection (by breeding between two subjects possessing the selected characteristics) to more complex methods requiring knowledge of genetics and chromosomes (GMOs).
Today we will focus on the so-called method of selection, and specifically on the setup to execute this method. Through this article we will discover together how to create your own breeding / seed production space that will best meet the different physical constraints of working with different varieties in the same space. Indeed, working with different males / pollen in the same place comes with a high risk of contamination and therefore accidental pollination.
The setup shown in this article is one of the breeding spaces at Aficionado French Connection. This real home-made laboratory is equipped with 8 totally independent spaces to best meet the desired objectives:
- have a space suitable for growing plants
- ability to perform controlled pollinations from different strains in the same building
- prevent leaks of pollen-contaminated air
- prevent inbound contamination (e.g. pollen entering a growing area or pest …)
STEP 1: CONTROL CULTURE SPACE
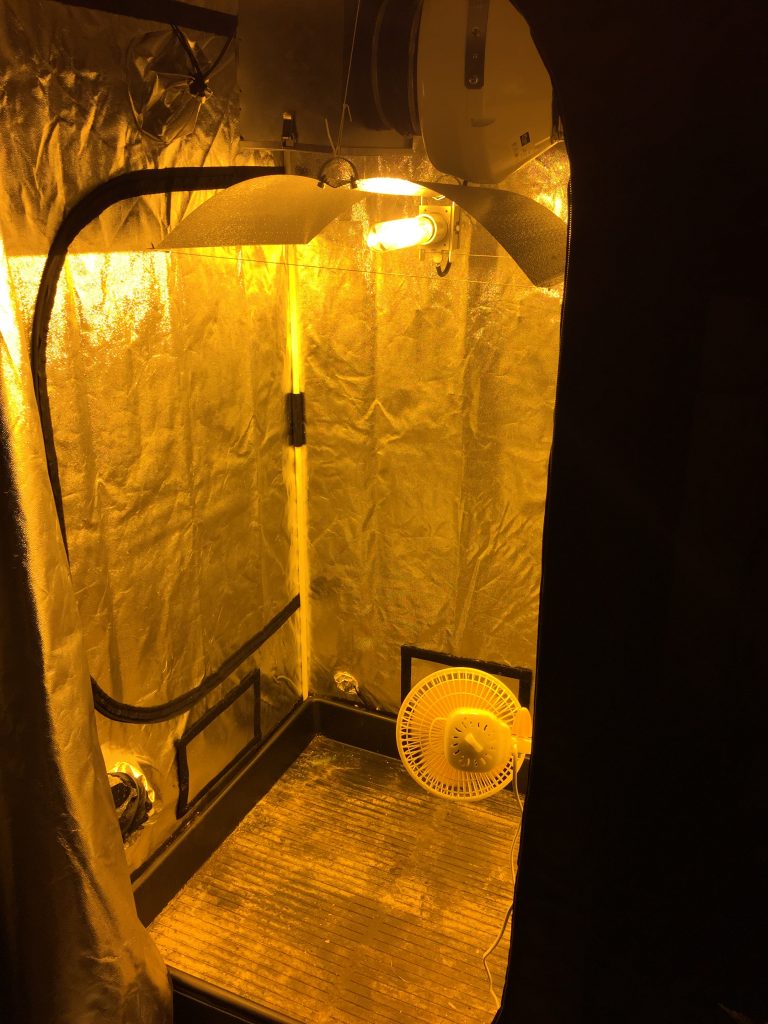
For our cultivation space, we go with a simple and effective system that is easy to scale. Our choice is therefore focused on 8 grow boxes of 1m x 1m x 2m equipped with :
- HPS 600w lamp
- a cultivation table 1m x 1m
- an oscillating fan
- we do watering by hand but a drip system can be put in place. This will have the advantage of being able to bring the water and the nutrients without having to open the tent and thus limit the risks of contaminations.
- 1 intake (1) 800 m3 / H + filter (a) (detail later in the article) placed at the bottom of the box
- 1 extractor (2) 1600 m3 / H + filter (b) (detail later in the article) placed at the top of the box
Some breeders will prefer to place the extractor + filter at the bottom and the intake at the top to better recover the falling pollen in the filtration system. This system has its advantage but during the pollination phase this may reduce the number of fertilizations by aspirating all the pollen. Our assembly creates a powerful enough air current going from the bottom to the top. Plants are in pots to facilitate the movement of subjects during selections.
Now that we have 8 spaces dedicated to the cultivation of the plants… how do we pollinate from different strains without contaminating from one box to another (accidental cross pollination)?
Note: depending on the strain, pollen can vary from 25 to 30 microns, which makes it almost invisible and very volatile! This is the main problem faced by breeders. Indeed, if you are working on the development of a strain or on the production of seeds for commercial purposes it is essential to be able to guarantee the origin of each seed, hence the importance of an installation that is perfectly secured. Filters, positive/negative pressure will be very useful tools.
STEP 2: POSITIVE PRESSURE ROOM
The riskiest moment is when you open a box to handle a plant, water them or to give any kind of care. In order to take as little risk as possible, it is essential to put positive atmospheric pressure in the room that hosts the boxes. The boxes, on the contrary, must be in negative pressure. This way, every time you open a box for pollination, the air of the room will be sucked into the box in the direction of the extractor. Before opening a box, amplify this negative pressure effect by turning off the intake and turning the extractor up.
As you can see on the map below, the 8 boxes of our system are gathered in one and the same room, in order to better control the atmospheric conditions of the space. The positive pressure of the room is obtained thanks to an intake that takes air from outside the building. And because all input must be free of any contaminant, we equipped the intake with a HEPA filter.
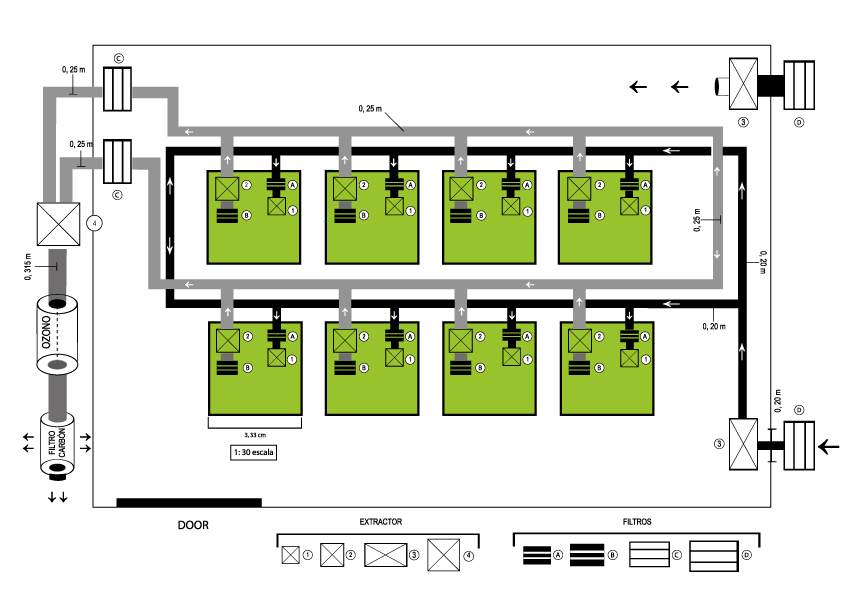
In the top right of the drawing, you can see the 4000 m3 / H (3) intake, followed by the HEPA filter (d). Pressure is controlled through an intake regulator. The positive pressure outside the boxes prevents contaminant from going out. The room is equipped with air conditioning to control the temperature.
The air circulating in the grow boxes is independent from that of the room and also filtered. Thanks to the two independent ventilation networks, both allowing to control the difference between the volume of incoming and outgoing air, we can create negative pressure in the 8 boxes.
Note: it is advisable to have small air purifier (UV + filters) in the room to reduce the risk of contaminants.
STEP 3: AIR SUPPLY SYSTEM FOR POLLINATION SPACES
The air circulation network (intake / extraction) is of prime importance. It will ensure your plants have an atmosphere free of contaminants. As seen previously, the air circulation system of the boxes is independent from the air of the room.
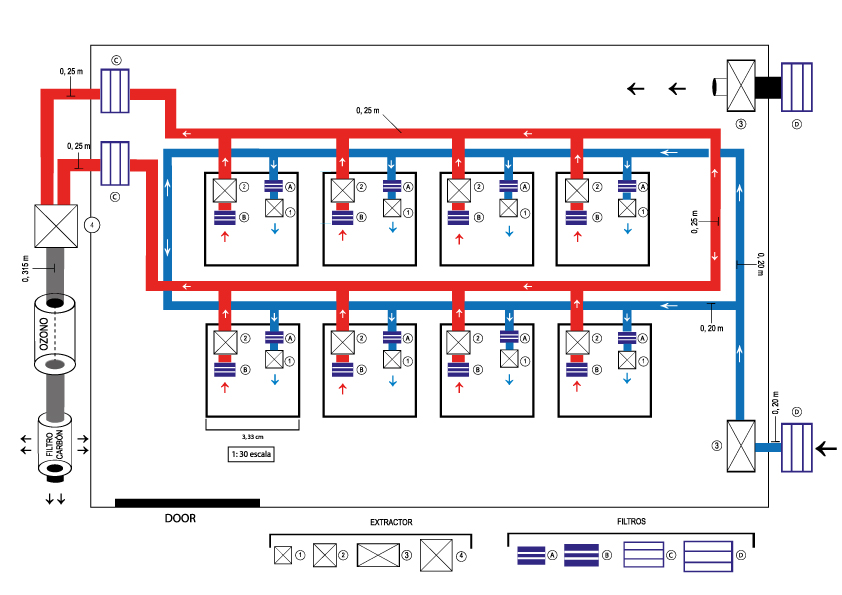
In red: extraction network to the pollination spaces
Air intake
In blue, the intake network takes its air outside the building thanks to a motor with a capacity of 4000 m3 / H (3) which is preceded by a HEPA filter composed of a pre-filter + filter (D).
Note: for an air intake system, the filter is always placed upstream the engine (see drawing) so that the air passing through the engine is free of contaminants. If the filter were placed afterwards, the contaminants would deposit in all parts of the engine.

The main feed tube forms a loop from which will depart different derivations to supply all the boxes. Forming a loop improves air distribution to the boxes, while homogenizing the pressure. We built the main network in rigid tube (200mm diameter) while the branches connecting the boxes to the main network are flexible sheath. You should maximize the use of rigid sheath to prevent pressure losses.
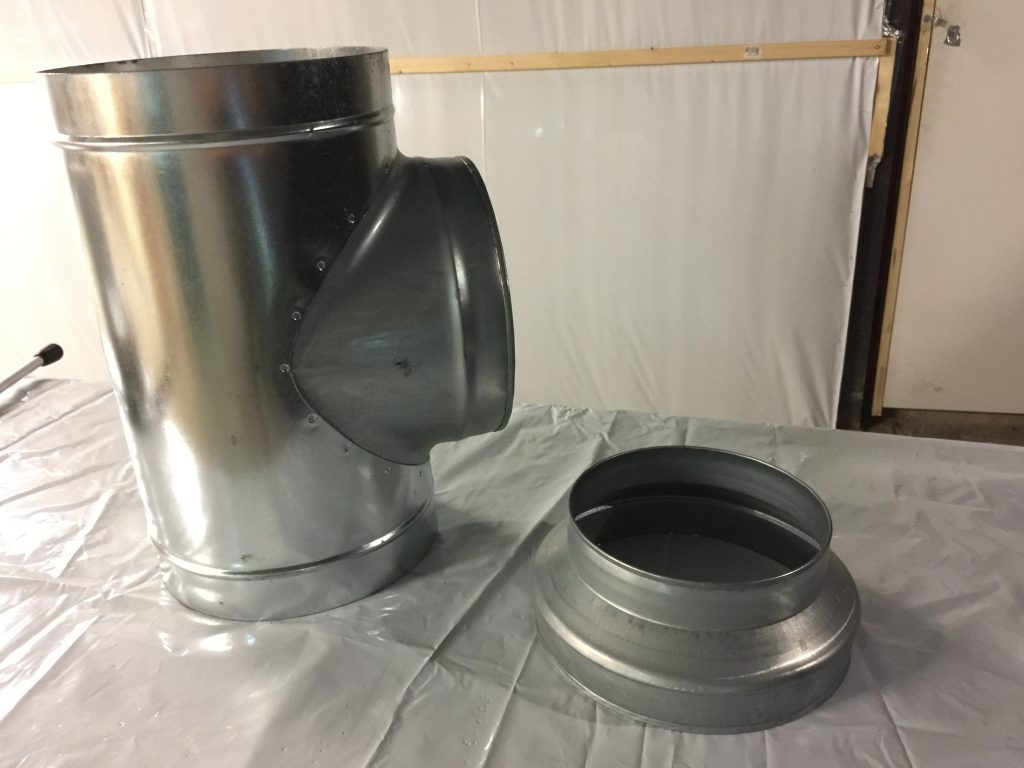
extraction network T diam 250/200/250
intake network T diam 200/200/200
Derivations are easier to implement using flexible ducting, especially when the tube needs to take different curves to connect the filter and the air intake (placed in the box) to the main system.
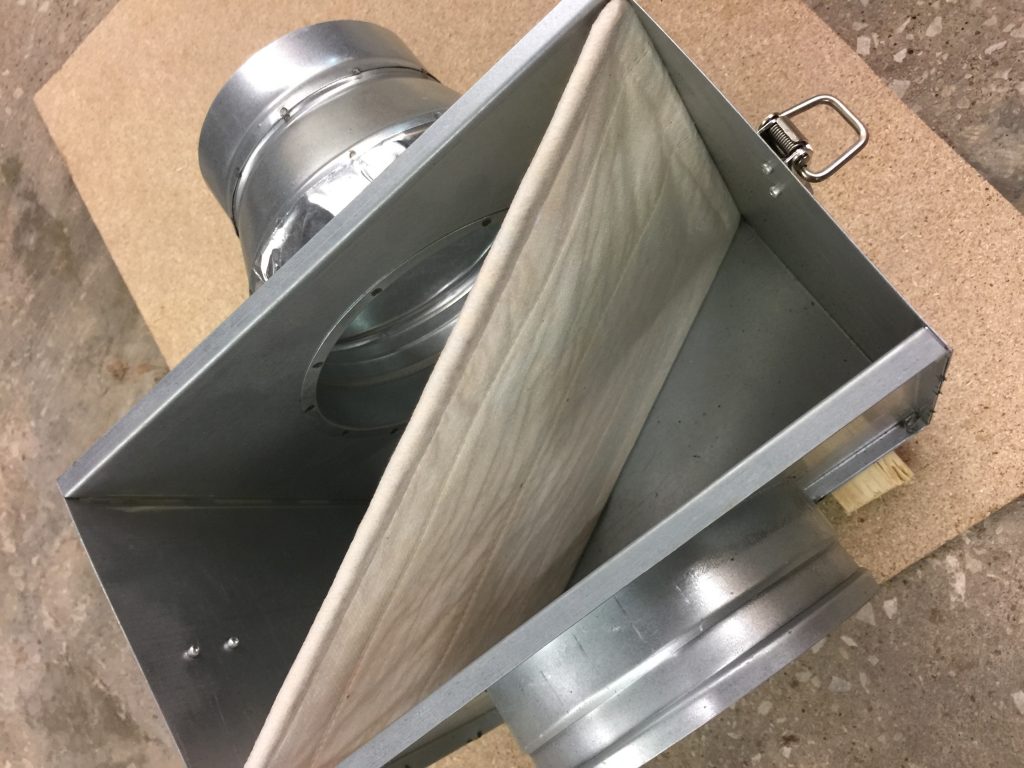
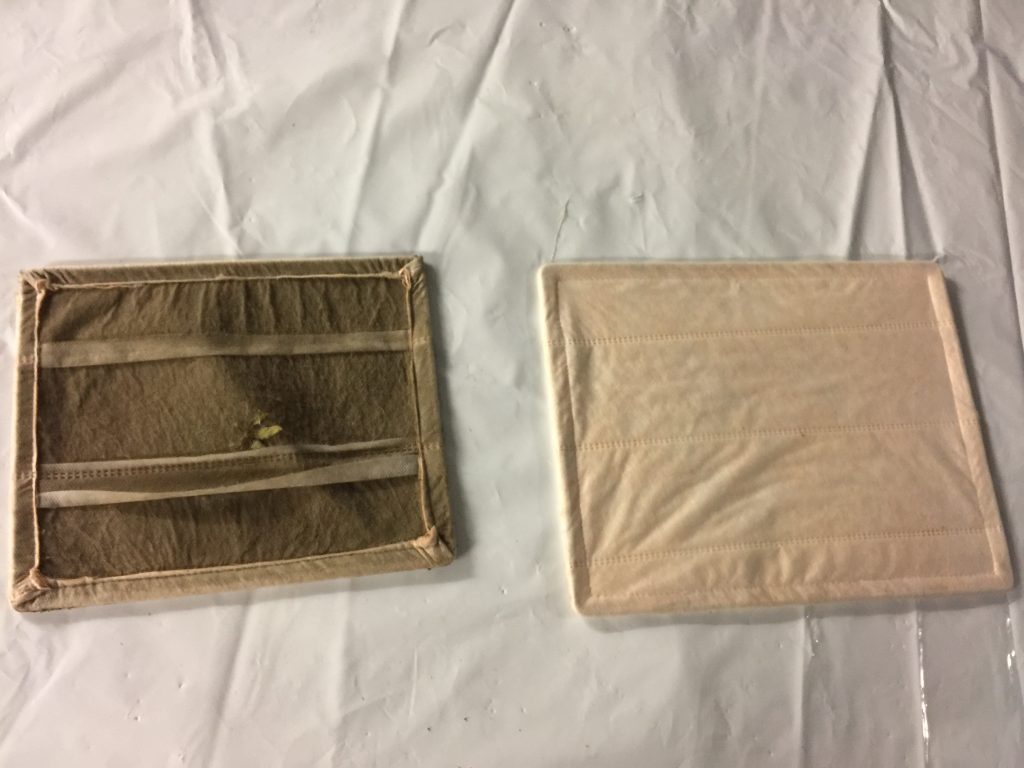
Each tube entering the boxes is equipped with a simple pollen filter (A) (see photo above) followed by an 800 m3 / H (1) motor.
Intake motor must generate half the power of the extractor, knowing that for each box we use a extractor with a capacity of 1600 m3 / H.
Each intake is also connected to a regulator in order to maintain them at 500 m3 / h, with the main input = 4000 m3 / H for 8 boxes.
Note:
- when calculating the air intake power, always take a margin of 30% as there’s often a difference between theory and practice and it is possible in practice that a certain box is more or less powered than another. You’ll have to play with different extractor potentiometers to manage the pressure. Elbows or angles taken by the duct, as well as filters can reduce the flow.
- the addition of air filters reduces pressure and air flow (up to 30%, depending on the model), so it’s better to install a filter of a larger size. For instance, if you have a 200 mm duct, choose a 250 mm filter equipped with two reducers 250/200, the filtration area will be larger and therefore reduce the resistance.
- before opening a box, always reduce intake flow and increase extraction.
EXTRACTION
Based on the same principles as for air intake, extraction (shown in red) is also composed of a main network (250mm tube) which will connect each box thanks to derivations (200mm tubes).
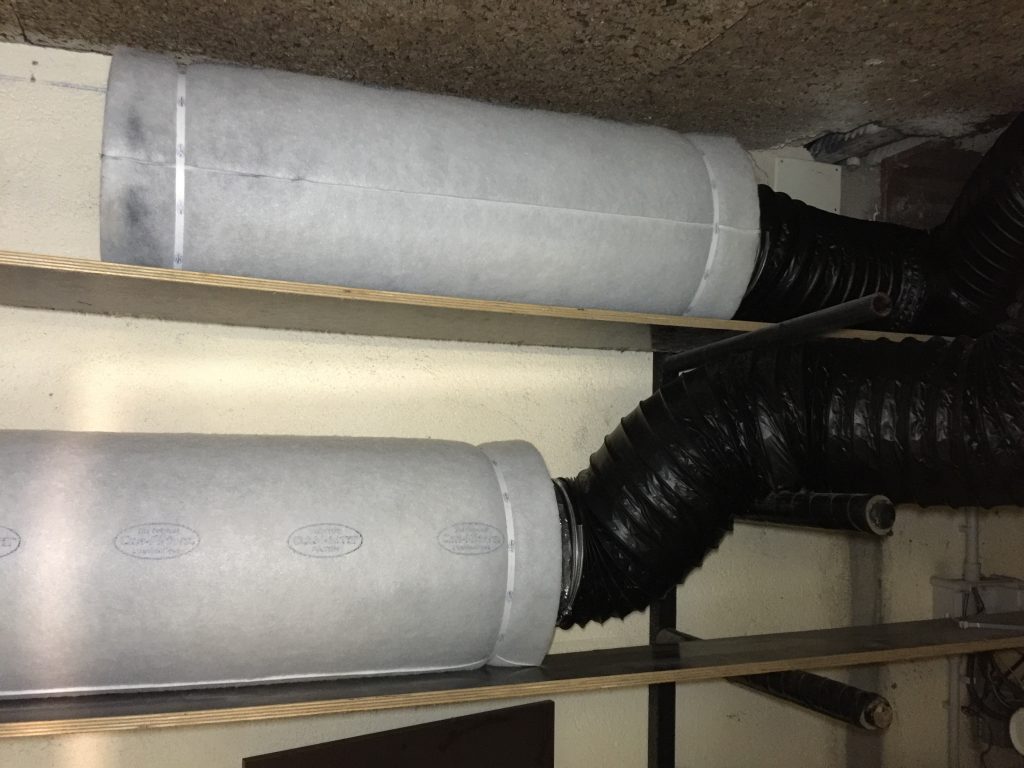
Inside the box, a conventional pollen filter (b) is connected before the extractor of 1600 m3 / H (always put the filter upstream the motor). The extractor is placed at the top of the box to evacuate the heat upward (each extractor is equipped with a regulator). The sucked air will therefore first pass through the pollen filter and then pass through the main collector before being treated a second time by a HEPA © filter that will finish collecting any fine particles present in the air.
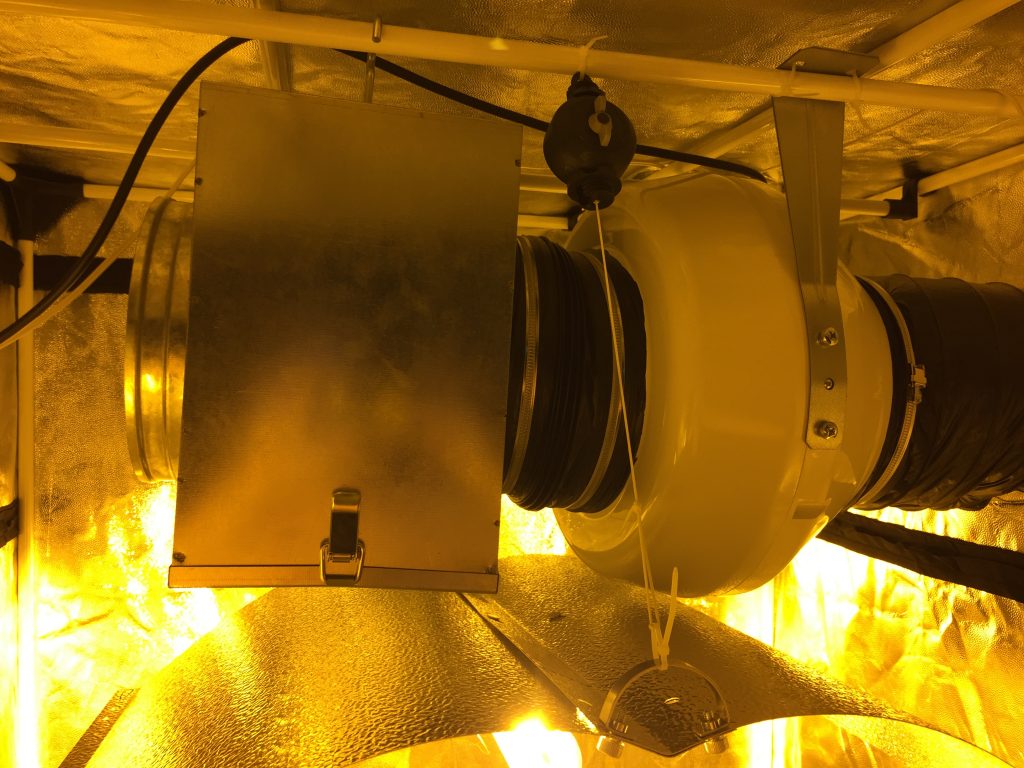
Note: the filter opening is placed downwards to facilitate handling
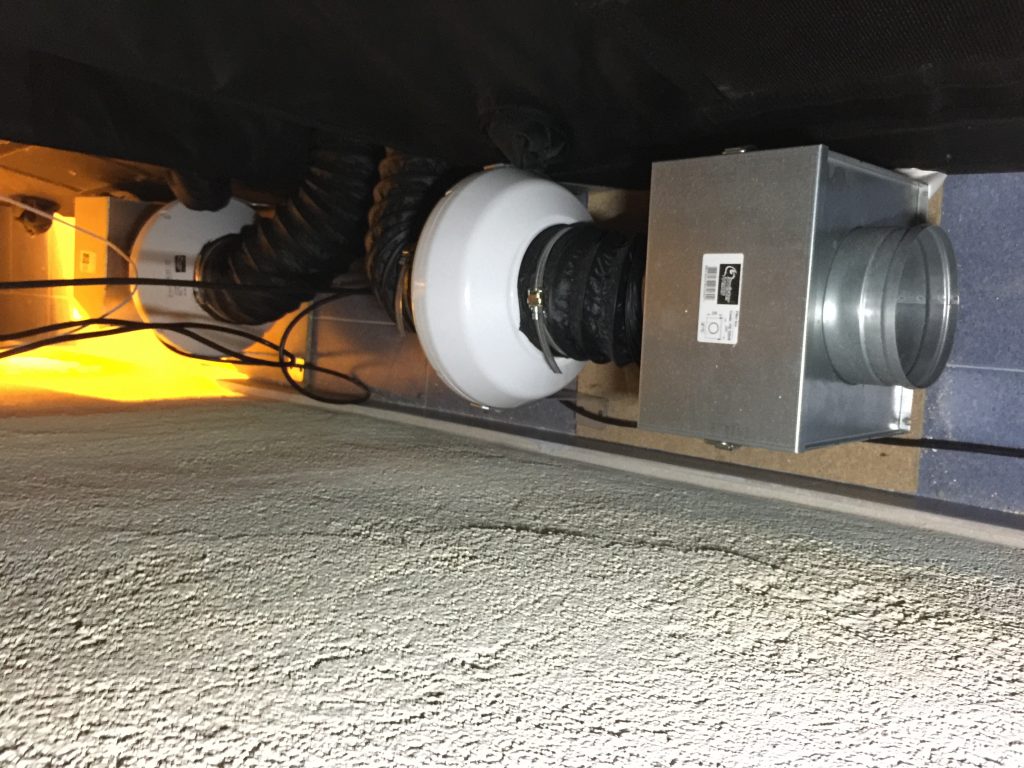
After the main engine is placed, we connect an ozone generator that will complete the air treatment (neutralizes odors, spores and bacteria).
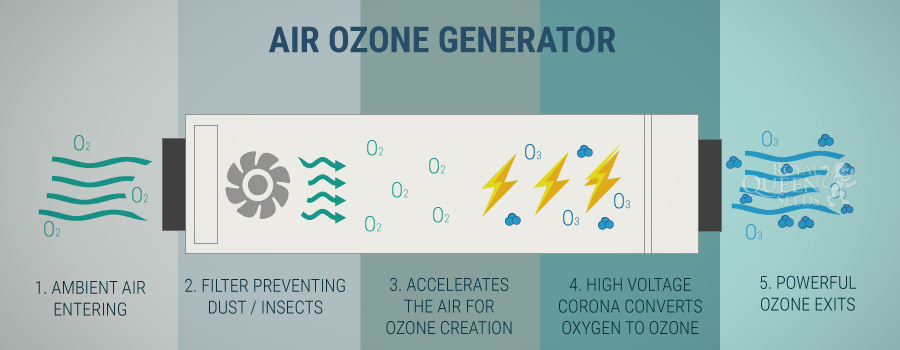
As you can see in the picture, an elbow is formed before and after the generator. This is to slow down the air and to make it easier on the ozone generator.
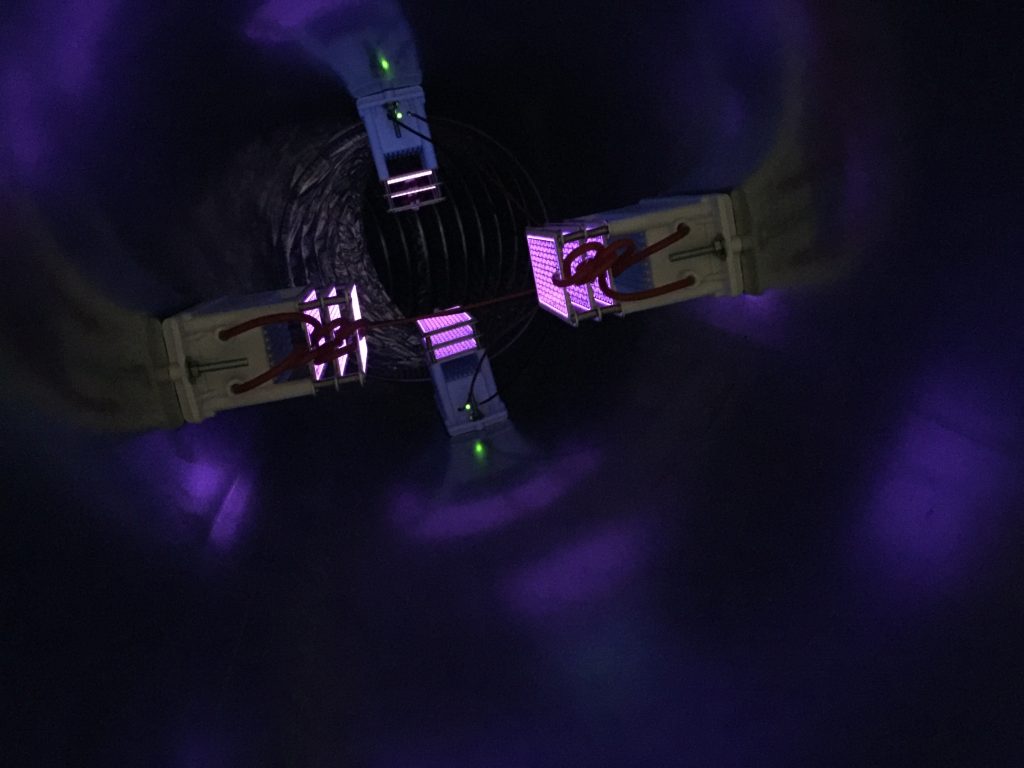
Ozone generators are often expensive, but an alternative exists. You can build one yourself by buying only ozone generator cells. We built the device using 4 cells (16gr / H ozone) of 3 plates placed in a tube. We spent roughly 300 euros to build our own. A generator should produce 12g of ozone / H, for an air flow of 3000 m3 / H. So in order to treat 9000 m³ of air, 36g of ozone will suffice. With our 4 cells of 16g each (total of 64 gr.), we are well above the necessary threshold.
Note: you can also connect the cells independently to operate only 2 if needed (in growth period), or 4 (during flowering / pollination).
At the end of the line comes the carbon filter, which will help neutralize any smell caused by the ozone generator. Some breeders may skip this filter because they feel that ozone is enough to neutralize the smell of plants.
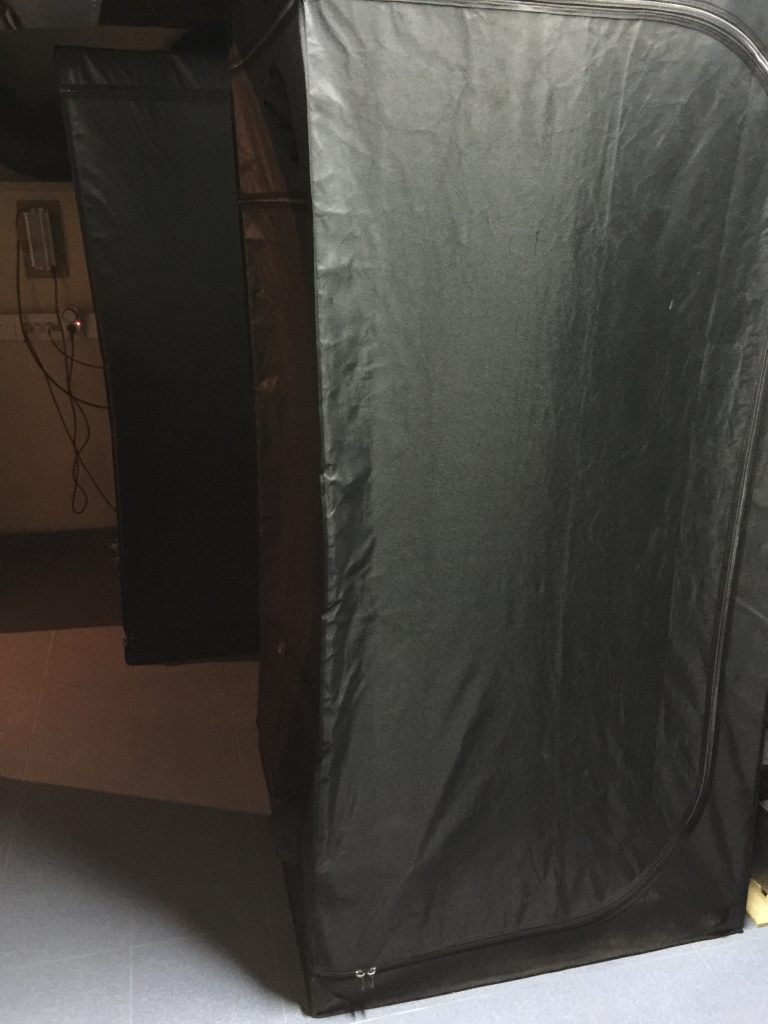
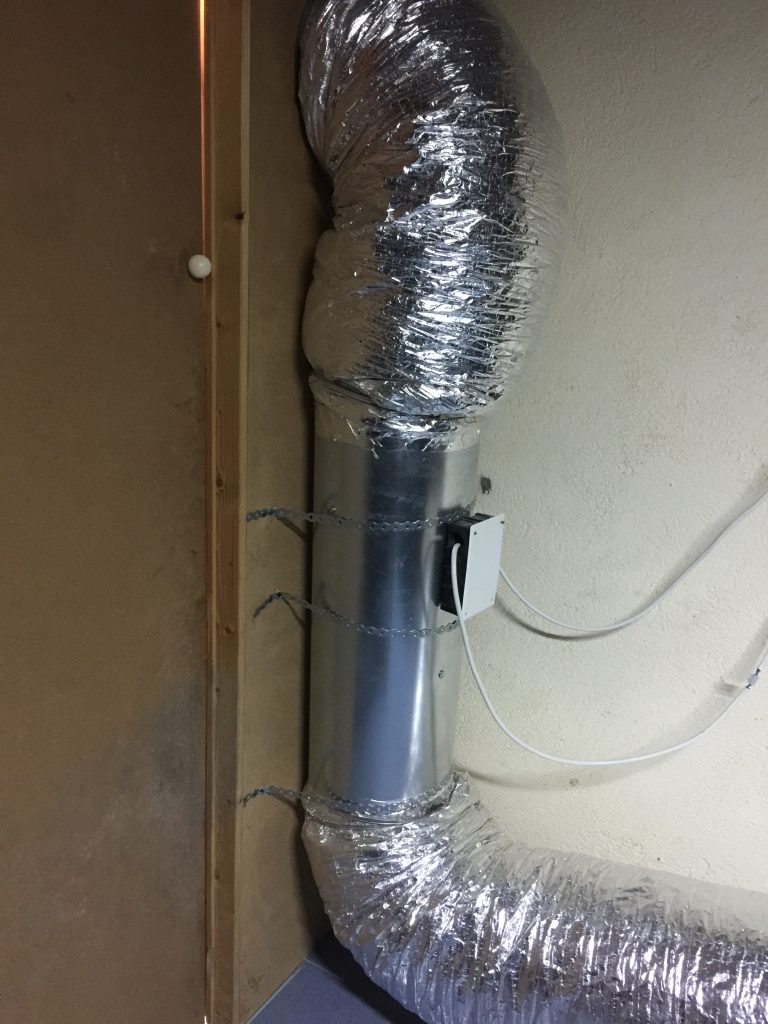
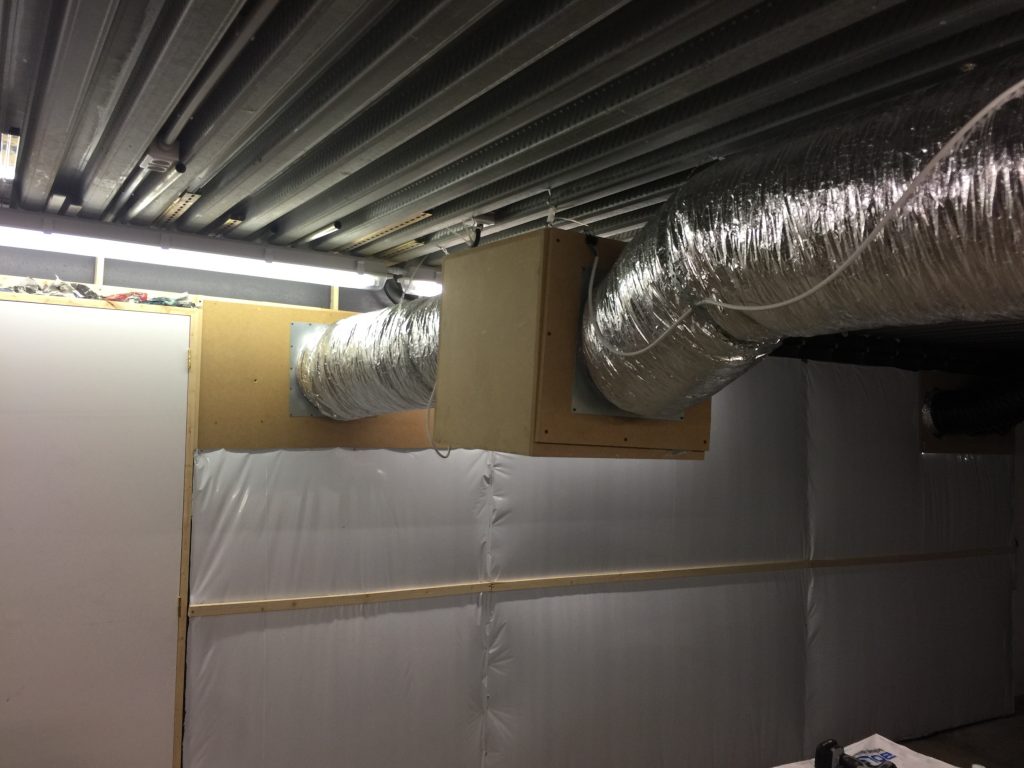
The air must be vented outside the building so as not to re-inject hot air that is low in CO2 (and potentially polluted in case of a malfunction in your system). If the travel distance is too long, causing a flow loss, you will need a second extractor placed on the exit line. As is the case for our installation (see picture below), we had to place a second extractor of 3500 m3 / H (between the ozonizer and the carbon filter) to compensate for the flow loss caused by the great distance to go to evacuate the air.
Notes:
- It is recommended to always choose the main area collector one size above the branch lines. The reduction will allow an increase in pressure.
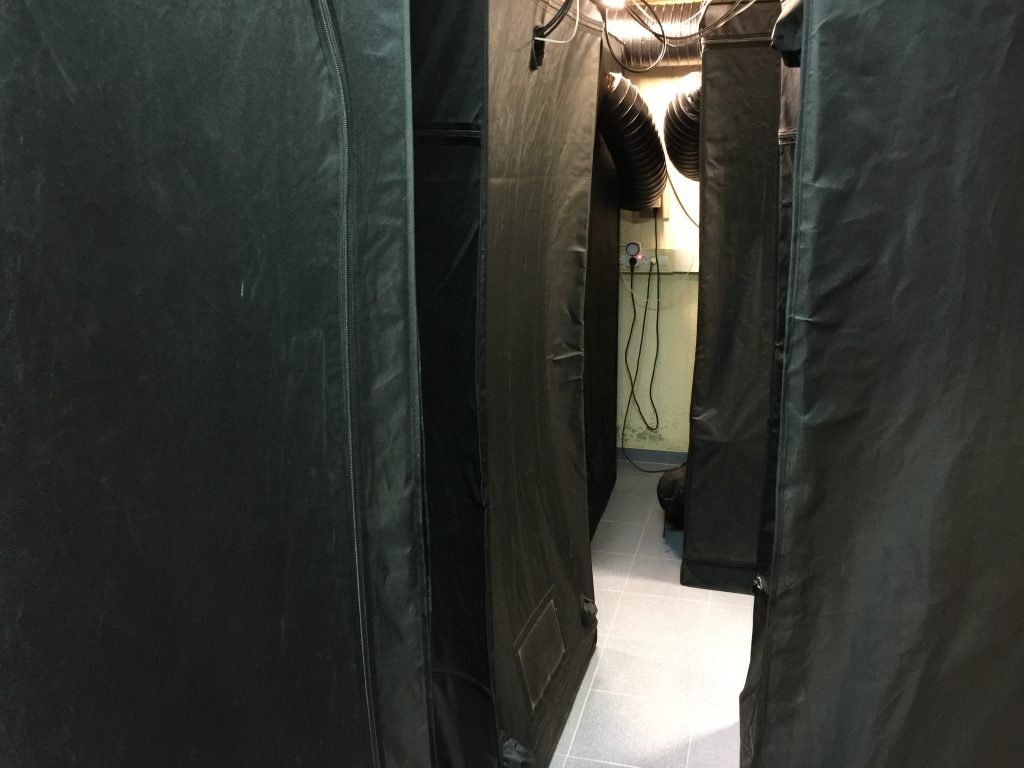
- The filter, the extractor, the ozone generator, … should ideally be placed outside the room where the boxes are installed, for a simple reason, each connection is an additional risk of air leakage and therefore of contaminant release.
- When entering the breeding area, always change shoes or use show covers and put on a blouse. This will limit the entry of contaminants. A foot bath containing a cleaning solution can also do the trick.
- Spray a mixture of water and soap to neutralize pollen.
- Change each filter after each session.
This is how we conceived one of our breeding spaces. This space is actually attached to a mothers’ conservation space, a growth space, and a cloning and propagation space. Seed selection is made in the flowering spaces from which clones of each subject are drawn while waiting for the final selection.
The advantage of this setup is that it is easily scalable from a 1-box setup to as many as your wallet, your motivation and your space will allow. Tube diameter, motors and filters of the main networks will be the only characteristics that will change according to the number of boxes. The electrical installations must be carried out by someone who is skilled and well-equipped, as the fire risks should never be neglected.
Finally. always work with a single male! You are free to pollinate females of one or more varieties per male and per box.
Written by Professor Q from Aficionado Estates / Aficionado French Connection
Thank you for the insight and knowledge. We hope one day to be as methodical as this.
Glad you found this content helpful!
Fantastic, intelligent set-up – thank you for sharing! using your 8 grow tent set up example, any general estimated cost to put together this set-up is warmly welcomed
Glad you liked this article.